When last we left off the new "6 Pack" was assembled and sitting on a mat on the ground near the compartment where it will be installed......the rust inhibitor was drying, and all that remained was to apply the new gray Rustoleum enamel over the rust inhibitor and then install the "6 Pack".

Around 11 Thursday I started applying the gray Rustoleum, and by 1 it was dry. In the interim TLE and I assisted Tom in his quest to find the corners of the building site for the new barn using the figures provided by the architect I believe....or maybe it was the surveyor.....I'm sure Tom will remind me later. Nevertheless we finally were able to pound stakes into the ground representing the four corners of the barn, and now we know it's orientation to the house, and the property boundaries.
Then, for me, it was back to the "6 Pack" project......I needed to finish drilling the 4 holes in the piece of Corian Tom had provided as the new platform for the "6 Pack"....of course, when I went to install the Corian one hole was slightly off.....that is to be expected when utilizing the "Hockwald Way".....but I was able to slightly enlarge the hole through the metal floor and all lined up.
Next it was time to move the assembled "6 Pack" into the compartment and fasten it to the platform with screws, but first I needed to attach the 5 incoming air lines to the "6 Pack". Once that was done and the valves were secured to the platform with the screws it was time to connect the many wires. Using the printed picture with my handwritten notes I began the process.
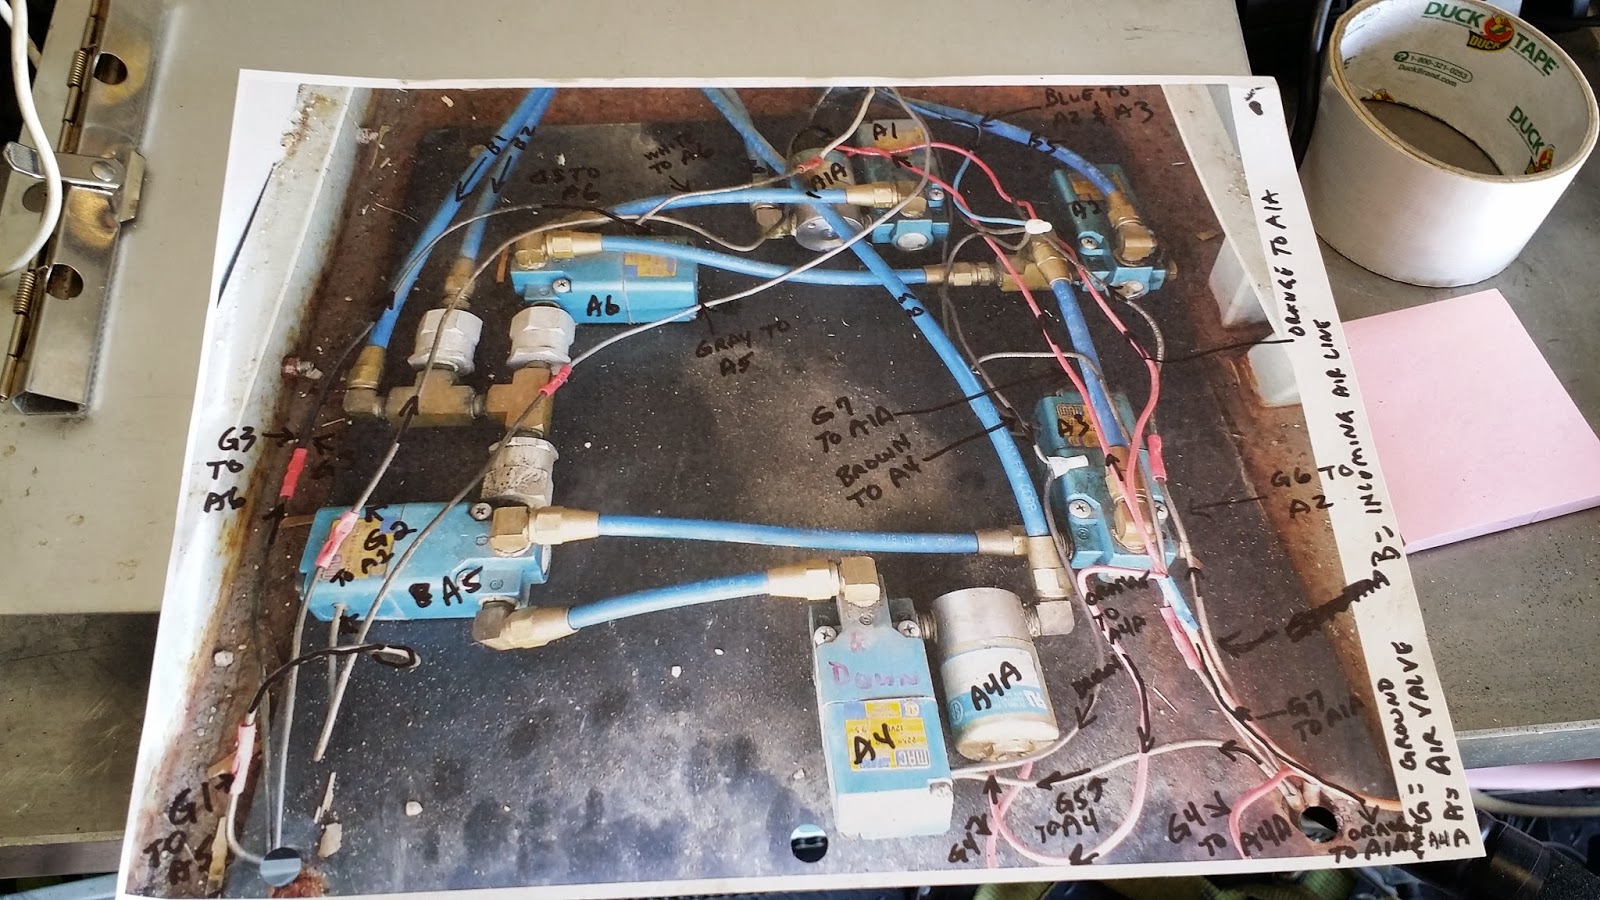
The picture (above) provides a nice "before" shot of the 32 year old "6 Pack", and the picture below provides the "after"......quite a contrast, no?

A "6 Pack" every guy would be proud of......
Of course, the next step was to fill the system with air again to see if there were any leaks, and there were a couple of very small ones where the air lines attached to the manifold, but I was able to finish tightening those connections pretty quickly and the system not only seems to be holding air, the front valves actually raise and lower the front as they should now. Prior to the "fix" I could only lower the front, not raise it, so now I have full functionality once again.
By the time I finished putting all my tools, and other stuff away it was closing in on 5:30 pm. I was filthy from head to toe from my work on the installation so I headed into Tom's home, at his invitation, to take a shower in their cavernous shower room just off the master bedroom......there are like 5, or 6 shower heads, so you are being hit with hot water from all sides. By the time I emerged about 25 minutes later I was so relaxed I could have laid down and gone to sleep for the night.
One more thing crossed off the "to do list" and, now, on to the next item.
Thanks for stopping by!

No comments:
Post a Comment